


Are you among the creative people who want to personalize your LED (Light Emitting Diode) screen walls and do it on your own? Or if you are someone who would rather do it yourself than hire a professional, you could try to DIY your LED screen wall. Some would think that setting up something like a DIY LED screen would be a bit challenging. However, learning and understanding the steps could be beneficial and may not be as difficult as many would think.
Over the past years, LED walls have gained popularity in the worldwide market not only because of their sleek design but also because of their other features that capture the interest of many. And doing a DIY led wall is one of the in-demand activities recently.
Overview of LED Screen Walls

Before you DIY your LED screen wall, let’s talk first about LED screen walls. What are LED screen walls? These wide-screen displays are made of multiple smaller LED panels that work as one to project videos or photos.
One example of an LED screen wall is an electronic billboard that can be seen high up in a building, displaying advertisements. And these technologies usually have high resolution and brightness.
DIY Your LED Screen Wall: Guidelines and Instructions
 Image Credit: Gemini AI.
A successful DIY LED screen wall needs to follow certain steps and guidelines. Understanding and following the guidelines would help make it easier for you to make your DIY project. Let’s dive into each step as we DIY your LED screen wall.
Step 1: Preparing the Plan and Budget
Before anything else, we must first identify the purpose of the display. We must identify the what, why, whereand how of this project. What kind of screen walls do you need? Why are we installing such LED screen walls? Where is the installation site? How are we going to make this happen? Once we are done with setting the purpose of the project, the next step is to prepare financial and budgetary allocations.
Budget and financial allocations are one of the primary things to do before starting the projects. Knowing how much the budget is for the project will help us allocate how much will be spent on the LED screen and other miscellaneous items.
As we DIY your LED screen wall, we also need to schedule everything. Planning when to start and when it is expected to finish will help in mapping what must be done each day.
Step 2: Preparing the Installation Site
After the planning phase comes the execution phase. Before setting out and installing the LED screen wall, we must first check the site and area where you plan to install the screen display.
Check and inspect the wall area to see if it’s appropriate for your screen. Some points and questions need to be answered before installing the screen display.
- Is the surface of the wall clean and even?
- Can the wall bear the weight of the LED screen?
- Is it pleasing to the eyes?
- Is the location perfect for viewing?
A positive answer to all these questions means you are all set to start the installation.
Step 3: Setting Up the Screen Frame

As we DIY your LED screen wall, we need a screen frame first. This screen frame serves as the house and protection of the LED panel. Therefore, proper setting up of the frame must be done to make it more sturdy. So how do we do that?
- Identify the specific area and mark where the screen will be hung. Use a marker and measuring tape or ruler to get the exact dimensions of the screen frame. Level can also be used to ensure that the horizontal and vertical levels are accurate. Once done, sketch the dimensions of the wall surface.
- Gather all the parts to be used and set up the screen frame following the manufacturer’s instructions. See screen frames are pre-assembled depending on its manufacturer. Also, remember to include an anchor and bolts to be used in attaching the frame to the wall.
- Hanging the assembled screen frame as we DIY your LED screen wall is a must. Usually an anchors and bolts are used to attach the frame to the wall. However, if the screen is too big and too heavy, brackets and crossbars can be added for additional support.
- The last thing to do to ensure that the screen frame is strong and sturdy is to test it. So how do we do that? We can try to put heavy things on the frame or drag and pull the frame from the wall. If it doesn’t budge, you are good to go to the next step.
Step 4: Laying Out the LED Tiles
Laying out the LED tiles as we DIY your LED screen wall is like doing a jigsaw puzzle. But before starting this, we should make sure that the space we are working on is clean, well-lit, and big enough for the project. Also, make sure that all the necessary tools are available. Now, let’s start to lay out the DIY LED wall panel.
- Collect and gather all the necessary tools, the LED tiles to be used, and other accessories as stated in the manufacturer’s manual. Then start assembling the tiles according to the manufacturer’s instructions.
- According to the manual, just follow the instructions on how to mount the LED tiles into the screen frames. Usually, there are step-by-step instructions in its manual on how to mount the tiles as you DIY your LED screen wall,
- A reliable and stable power source is a must to extend the lifespan of the screen. Thus, after mounting the tiles to the screen frame, it’s time to connect it to a power source. Power cables and signal cables must be connected to the tiles.
- Once all the cables are connected, it’s time to turn it on. Testing whether you failed the task, you can check it while looking at the LEDs. When there are dead pixels, misconnections, and odd colors, it means there is something wrong with the project. Check the manual on how to solve these kinds of problems.
DIY Your LED Screen Wall: Processors and Software
Processors and software go hand in hand in every LED screen wall. As you can see, the processor is the one that interprets signals. The configuration software is the control panel of the system. It is the one responsible for adjusting the color, brightness, and contrast of the content to be projected. Therefore, superior quality for the processor and software must be sought.
How do we look for the best processors and software that match our needs?
- First, ask what the reason is for using the processors and software. Is it for personal use or for business? Choosing the right processor and software must match the required specifications of the LED screen.
- As you DIY your LED screen wall, the software and hardware of the setup must be compatible for them to work smoothly.
- There are different types of software available in the market. Here are some of the characteristics of the software you want to look for.
- For beginners, look for an easy-to-use interface. This allows you to easily manage the content and diagnose the problem.
- Multifunctional software is the best choice. Looking for software that can be used from text to videos would be beneficial. Also, there is some software that allows you to change content at a scheduled time and place.
- Managing the contents and updating them remotely is ideal for wide-screen displays like billboards.
- Other software allows multiple panels to project content simultaneously.
- Security features of a software are a must to protect against unauthorized changes and display
Requirements for Your Processor

As you DIY your LED screen wall, the processor, as the brain of the system, must also possess characteristics to be considered.
- Make sure that the processor can operate even with high-resolution images and videos.
- Processors must have multiple ports for input and output devices.
- Processing power depends on the needs of the display. Higher processing power is needed for high-quality content.
- If expansion of the display is in the plan, make sure to look for a ten that could accommodate additional LED panels.
- The ten must be stable and reliable, even if they’ve been used continuously.
Having customer support helps in case certain trouble arises as we DIY your LED screen wall. Therefore, choose the processors and software from a known manufacturer. Customer service can assist in different situations, such as product planning and software updates.
Software must be updated regularly for security and performance purposes.
- Compare all the options you are eyeing. You can try the demo version of the ten software to see if it meets the needs of your setup.
- It is best to choose processors and software that are flexible and able to adapt to future improvements.
However excellent the ten and software are, always keep in mind that they should also meet the budget allocated for them.
DIY Your LED Screen Wall: Connection of LED Tiles to Controller
Connecting the LED tiles to a controller is not a walk in the park. This needs patience and thoroughness. As the LED tiles increases, the workload also increases. Why? Because each of those LED tiles must be connected to the controller.
After connecting every LED tile, it is important to test if the connection is correct. If there are any poor displays, it might not be properly connected; it is either kinked cables, loose attachments, or no connection at all.
DIY Your LED Screen Wall: Test the Setup
As a beginner, you would not know what to do to test the setup. So here are some things to try to check.
- Power supply. Check the power cables and power supply.
- Wiring. Check any loose wires or those wires that are not connected.
- Controller. Check if the controller receives data and functions perfectly.
- Content and media. Pay more attention to the details of the contents and their resolution.
- Sounds. Make sure that the sound is audible and recognizable as well.
DIY Your LED Screen Wall: Cleaning and Maintenance
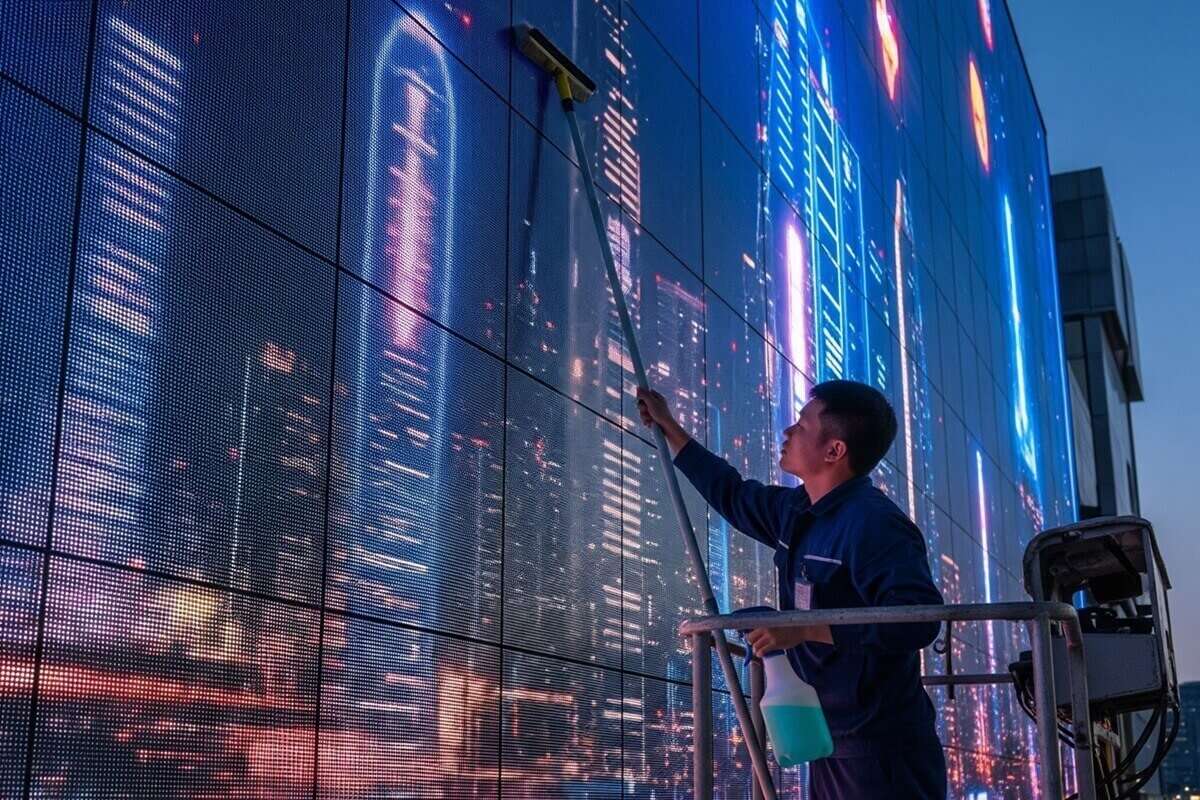 Image Credit: Gemini AI.
Extending the life of an LED screen wall is the main goal of every user. Therefore, here are some tips to extend its lifespan.
Regular Cleaning and Maintenance
Regular cleaning is necessary to maintain the brightness of the screen display. Dust and other dirt can affect the brightness and clarity of the screen. Therefore, use a soft cloth, like a microfiber, to clean the screen. You can also use LED safe cleaning solutions, depending on the manufacturer’s cleaning and maintenance guidelines.
Immediate Repair and Replacement
Repair and replacement are needed for parts that have already malfunctioned. Immediately doing so can prevent bigger issues in the screen display.
Regular Software Updates
DIY your LED screen wall needs to update the software. It is necessary not only for protection but also to enhance the function and features of the display.
Regular Diagnosis and Screening
Some things are beyond our powers; that’s why there are professionals in this area. If you have tried every attempt to repair the display and followed all the recommended solutions from the manual, but still nothing happens.
It’s time to call and hire professionals. While the professional is sorting out the problem, try to understand what he is doing so that in the future, if it happens again, you will know what to do.
Conclusion
As you DIY your LED screen wall, there are many things that must be considered and many steps to follow. However, if you are really into DIY, you will find this project quite interesting.

