


A good-sized LED wall can cost tens of thousands of dollars depending on the type, quality, and software used. If you’re going to have one installed, you also have to factor in the installation fee in the total cost. Most of the time, suppliers will include installation services with the purchase of a unit. But if you’re an individual who likes to save (except for your time and effort), you can totally buy individual LED modules and piece them together to form a display as big as you need. These modules come in different sizes and pixel pitches. We’ll get to that later.
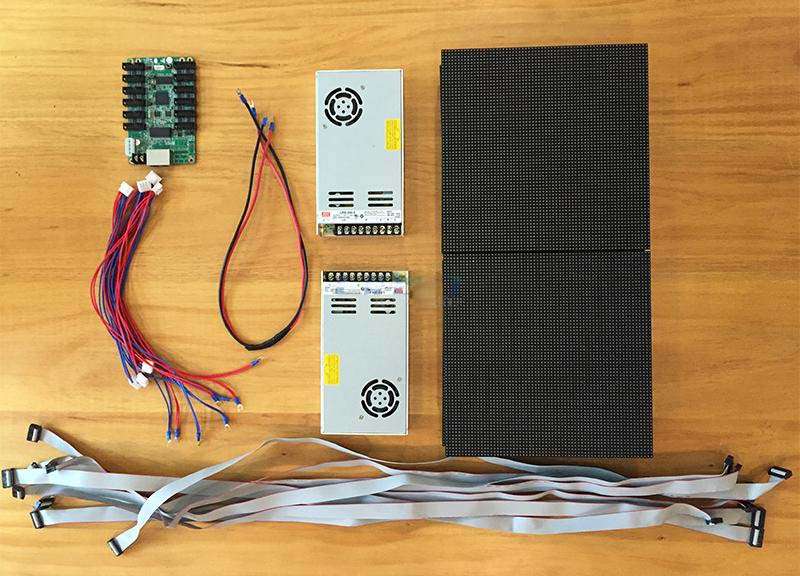 Materials of LED-display
In this guide we’ll show you how to build a DIY video wall without the big price tag.
Step 1: Planning and Preparation
Determine Display Size and Resolution: The most important step in planning is determining the size and resolution of your video wall. These two will determine the number of LED panels and power supplies you need. As mentioned earlier, LED panels (or modules) come in different sizes and these depend on pixel pitch. For example, P5 LED modules come in 160mm x 160mm and 320mm x 160mm, while P4 modules come in 128mm x 128mm and 256mm x 128mm sizes. Meanwhile, resolution determines the quality of your display. Good quality modules have resolutions of 1920 x 1080 or 3840 x 2160.
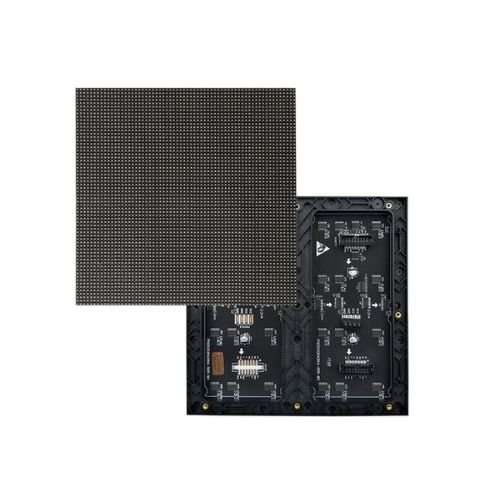 A P3.5 LED Module
Choose a Location: Your choice will determine the complexity of installation and maintenance. For DIY installations, don’t be too adventurous in choosing the location as you may not have the expertise and tools needed. Start with a simple wall mounted display that’s easily accessible.

Gather Materials: Once you’ve determined the display size and location, you can now compute how many modules and metal bars you’ll need. Plan your budget and gather the necessary materials, including LED matrix panels, power supplies and a sender card. Panels usually come with power cables and data connectors.
 Diy led wall
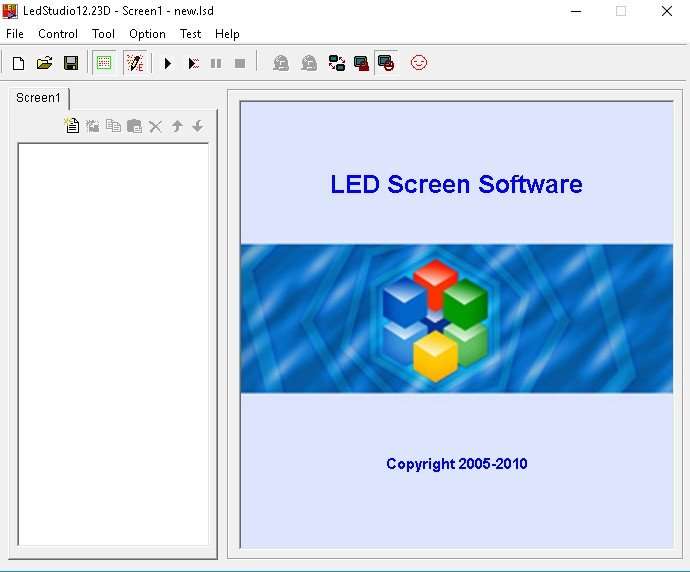
Choose Software: The software will allow you to design and manage content. Do your research and find one that’s suitable for the type of content you’ll be displaying. Some of the popular ones are LEDStudio and Glediator.
Step 2: Building the Video Wall Infrastructure
Build the Frame: Design and build a sturdy frame to hold your LED panels using 2×4 or 2×2 steel bars. Make sure the horizontal and vertical bars match the size of the panels as even the slightest deviation will cause the panels not to stick. The panels usually come with magnetic flathead screws that can support its weight when attached to the frame.

Attach the Panels: Attach the LED panels to the frame, make sure they are properly aligned and spaced. Gaps will affect the overall quality of the display.

Wire the Panels: Connect the LED panels to the sender card using the power cables and data connectors (IDC 16 Ribbon Cable) they came with.
Step 3: Powering Up the Display
Install the Power Supply System: The manufacturer will indicate the maximum power each panel can draw. For example a P5 320mm x 160mm panel can draw a maximum of 18 watts and 5 volts which is 3.6 amps. For a 48 panel display you will need a 172.8-amp transformer. Say you have 3 60A transformers. This means one transformer can power 16 panels, two along and 8 down, or what’s known as the “star out” wiring.
If you have metal hooks on your cables, clip them off and strip the plastic back to expose the wires. Feed the cables from multiple panels into a terminal block. For example, you can feed 4 cables from 4 panels into one block and then have that go to 8 panels.

Connecting to the Transformer: Once you have your cables organized in the terminal blocks, feed a wire from each terminal block (upper and lower panels) to the transformer. Do the same for the other transformers and make sure each set of panels is connected and powered.
Data Cables: In addition to power, your panels need data to display content. This is done with standard IDC 16 ribbon cables that come with the panels. Connect these data cables between panels so the signal can travel across the whole display.

Power and Data Cables between Panels: For larger setups like a video wall with multiple panels you may find a Raspberry Pi or similar device isn’t enough to handle the data processing. Instead use professional grade hardware like LED sender and receiver cards.
Step 4: Assembling and Calibrating the Video Wall
Connecting the Sender Card

The sender card is the most important part that sends the video signal from your computer to the LED panels. Here’s how to do it:
- Connect the Sender Card: Use an HDMI cable to connect your computer or Mac mini to the sender card. The sender card will then be connected to a receiver card via an Ethernet cable which will send the signal to the LED panels.
- Power Up: Make sure all your power supplies are connected and turned on. Each transformer should be connected to a specific set of panels, following the star-out configuration above.
- Initial Test: Once everything is connected, turn on the system and see if the panels turn on. This initial test will help you identify any immediate issues like unresponsive panels or loose connections.
Step 5: Configuring the LED Studio Software
To control and manage your video wall you need to configure the LED Studio software:
- Install and Launch: After installing LED Studio, connect the sender card to your computer via USB. Launch the software and go to the configuration settings.
- Receiver Settings: In the “Receiver 1” tab enter the width and height of your display in pixels. For example if each panel is 64×32 pixels and you have 6 panels horizontally and 8 panels vertically your total width would be 384 pixels (64×6) and your height would be 256 pixels (32×8).

- Calibrate the Display: Calibration involves adjusting the pixel order and making sure each panel displays the correct part of the image. This step is critical to get a seamless and uniform display. Use the software’s tools to fine tune the alignment, brightness and color balance.
- Save and Test: Save your settings and test the display. Look for gaps, misalignment or color differences between panels. Make adjustments as needed until the display looks smooth and cohesive.

Step 6: Calibrating the Video Wall
Calibration is key to get your video wall looking its best. Here’s how to do it:
- Adjust Pixel Order: If the content isn’t showing across all panels you may need to adjust the pixel order in the software. This involves mapping out which pixels are displayed where on the screen.
- Fine Tune Alignment: Use the software’s alignment tools to make sure the content flows smoothly across all panels. Even slight misalignment can break the visual flow of your content.
- Check Brightness and Color Consistency: Make sure all panels are showing the same brightness and color. Inconsistent settings will make the video wall look patchy or uneven.
- Check Connections: After calibration double check all connections to make sure everything is secure and working properly. This will prevent issues during operation.
Step 7: Adding Content and Software
Now that you have your video wall assembled and calibrated it’s time to add the content that will bring it to life. The software you choose will play a big part in how you manage and display your content.
Creating and Preparing Content
- Content Types: Your video wall can display different types of content such as videos, images, text and animations. Think about the purpose of your video wall and the audience when creating content.
- Resolution and Aspect Ratio: Make sure your content matches the resolution and aspect ratio of your video wall. High quality, correctly sized content will look sharp and professional.
- Content Planning: Plan your content in advance especially if you’re using the video wall for events or presentations. A well organized playlist or schedule will make a big impact on the overall experience.
Software Installation and Configuration
- Software Installation: Install your chosen software on the computer that will be controlling the video wall. VLC is a popular choice for its flexibility and ease of use but you may also want to consider specialized video wall software depending on your requirements.
- Content Management: Use the software to manage your content. Create playlists, schedule content to play and adjust settings to suit your display.
- Test and Refine: Before going live test your content setup. Play through your playlists, check for smooth transitions and make sure everything runs smoothly.
Troubleshooting and Maintenance
Building a video wall is a complex process and you will encounter some issues along the way. Regular maintenance will also be key to keeping your video wall running smoothly.
Common Troubleshooting Tips
- Power Supply Issues: If some panels aren’t turning on check the power supply connections and make sure each transformer is handling the correct load. Overloading a transformer can cause failures.
- Panel Malfunctions: If an LED panel isn’t displaying correctly or has dead pixels check the data and power connections. You may need to replace faulty panels in some cases.
- Software Glitches: If your content isn’t showing correctly revisit your software settings. Recalibrate the display and check for any updates or patches that will fix software bugs.
Maintenance
- Cleaning the Panels: Dust and debris will accumulate on the panels over time and affect the display. Clean the panels with a soft, dry cloth to keep them bright and clear.
- Checking Connections: Periodically check all connections, power and data cables to make sure they’re secure and working.
- Software Updates: Keep your software up to date to get the latest features and security patches. Regular updates will also improve performance and compatibility with new content formats.
- Documentation: Keep a record of your setup, wiring diagrams, configuration settings and any changes you made during troubleshooting. This will be handy for future maintenance or if you need to replicate the setup.
Go Live and Launch
- Full Test: Run a full test of your video wall, all content and software settings. Check for any remaining issues, misaligned panels, content glitches or connectivity problems.
- Refine: Make any final adjustments to the display. This may be to tweak the brightness, contrast or color settings in the software.
- Backup: Consider setting up a backup solution, a secondary computer or power supply so your video wall can keep running in case of a failure.

